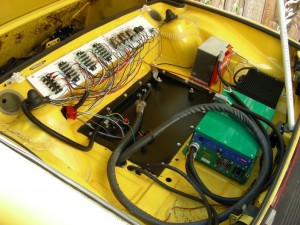
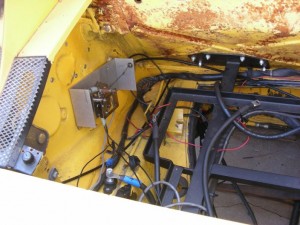
It’s ALIVE!!!

Well, ok, I just took it for a drive around the block on the weekend.  The regen action on the accelerator was kinda odd, so I’ll change that.  Also the acceleration was a bit weak, but we’ll see how that changes with the updates.  No clue about power usage, nor current usage, but again, that will change.

Planned updates:  regen enabled during braking only, update the lights in the dash to show READY and FAULT status of the controller (and to show the status in the rear trunk too), add serial cables to the passenger area (so I can run a computer while driving).
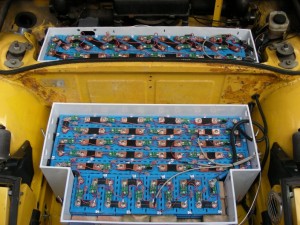
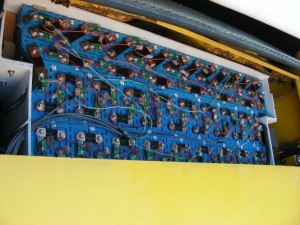
Tested BMS and Motor Controller

Ok, I tested the safeties on the BMS and the motor controller – all seems to be ok.  I do have some cutouts on the BMS during charging, but I suspect that is because the shielding on the cables are not all they are supposed to be.  I don’t have cutouts on the cable supplied with the BMS, but I do on the stuff I bought from Fry’s (go figure, cheap stuff from Fry’s???  gosh, the mind boggles 😉 ).  For now, I will suffer with occasional communications errors, but I will have to replace the cables sometime (Thanks Davide!).

So tonight, the Moment of Truth.  Will Sparky move?  Stand by.  🙂

Finished connecting BMS sensors

Wow, what a lot of work.  I have 108 batteries (the 109th doesn’t fit due to slight miscalculation…shrug), which means I have 216 bolts to fit in, 108 sensors to attach, etc.  Next step is to test out the BMS to make sure it can handle the job properly.  Fortunately, Elithion does a stellar job on their website, so I know what to do next.

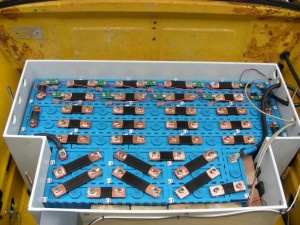
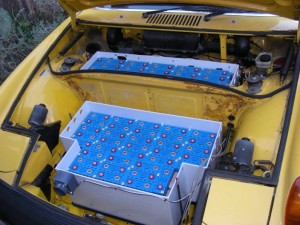
Here is the front battery packs all wired up.

Front Pack Wired Up

And here is the rear battery pack all wired up (my figures hurt now).

Rear Pack Wired Up

Starting BMS connections

In order for the Battery Monitoring System (BMS) to monitor all the batteries, there has to be some sort of device that attaches between each post on each battery.  For the Elithion BMS, there are banks of these monitors and they all report to the BMS itself.  It’s a bit complicated.  Fortunately, the Elithion website has some very good hints on how to go about this.  In the picture below, I have one bank connected up, with two more to go in that bay.

BMS Start

Helping, er, paws?

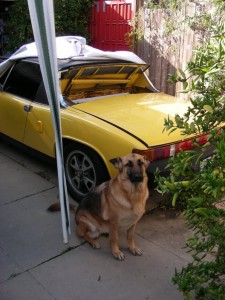
Someone that dearly loves to “help” with the conversion is our dog Zoe.  She was rescued from the pound 3 years ago, and has been a delightful addition to our household (with notable execptions dealing with destroyed shoes and semi-random barking).

Woof

Batteries put into boxes

So for the past few days, I’ve been making a super effort to clean up the battery boxes, and surrounding area.  This means putting the trunk lids back on, vacuuming up all the odd pieces of metal, and taping off all the exposed metal that could be hazardous in the battery boxes.

Then I went and lifted all the batteries into the boxes and put shims in around them to stabilize the batteries.  Well, shims, pieces of wood, spare plastic tubing, whatever works and is generally non-conductive.

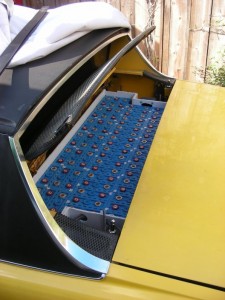
Here’s the rear trunk:

Rear Batteries Installed

And here’s the front trunk:

Front Batteries

Next step is to start wiring all the batteries (109 of ’em) together.

Battery Pack Disconnect and Trunk Shocks

Long weekends were made for working on cars, especially when turning them into real electric cars!   This weekend was no exception.  I finished up all the battery communication cables and hooked them up to the BMS.  I also added in the battery disconnect to the rear trunk (with some necessary re-arrangement of the cables).  Next up is adding in the control wires between BMS, Motor Controller and Charger.

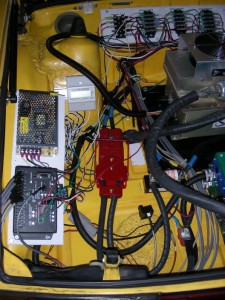
Battery Disconnect and BMS in place

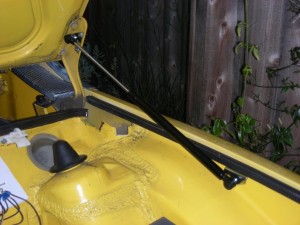
I also took the opportunity of adding in the rear trunk shocks and replaced the rear trunk lid – really nice to have the lid back in place.  Still a bit of cleanup near the shocks, but really nice items from camp914.

Rear Trunk Shock

Dash Progress and BMS Battery Connectors

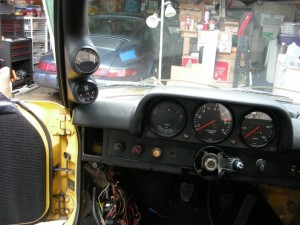
The new guages are installed – one is for the pack voltage, the other is the pack current.  Both are left and above the dash.  Speedo is also reinstalled, so the passenger compartment is (mostly) done.

Pack Voltage and Current meters

Working on the BMS battery connectors now.  A lot of fiddly little parts that require a magnifying glass (for my somewhat older eyes) and a good soldering iron.  Elithion did a very good job with their battery connectors – they actually show the color of wire to hook up where.  On the end of each battery group there is a connector that will have two wires attached – either black/red or green/white.  If you look carefully at the two wire connector on their part, it says B R / G W (or something like that).  Nice job.  🙂

Elithion Battery Connector and Communication Connectors

I still have the rear battery pack to work on, and then it is time to fuss once again in the rear trunk – I now have a quick disconnect for the battery pack that I need to fit in.

Speedometer Rebuild

Since the trip reset cable was missing, I took the opportunity to have the speedometer rebuilt.  At Sean’s suggestion, I sent it to North Hollywood Speedometer after getting a quote from them.  Very fast turn-around, very nice work.  When I realized I hadn’t asked for a reset cable, I called back, they remembered my speedo. They were able to build up a cable and sent it to me the next day….another amazing company.

Dealing with the BMS

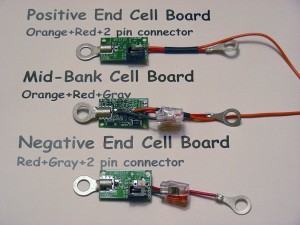
I finally figured out which of the interconnects are which. This took some careful reading of the Elithion website (my fault, not theirs) and as a public service present to you which connector is which:

BMS Cell Connectors

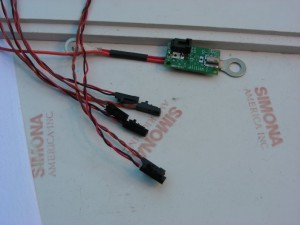
I’ve gotten the current sensor put together, but these tiny wires are enough to drive an older guy crazy.  I had to go and buy one of those soldering stations with those clips and the magnifying glass.  Sheesh.

Lots of little cleanup done

The holidaze were great – warm weather, no stressful driving anywhere, and time to take care of the small details. Cutting the boxes to proper size, attaching the fans to the boxes, running BMS signal cables (which involved pulling and re-running the power cables through the driver-side tube) and so on. Ready to start putting batteries in and hooking up the BMS cables.  Oh and mounting the BMS with a power supply as well.  LOTS of small stuff.  🙂

Battery Interconnects

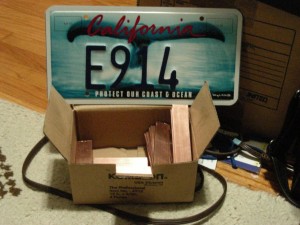
Well, the braided copper cable is cool and all that, but for the vast majority of connections, just plain copper bar is gonna be fine.  So I bought a whole bunch of pieces made to order at Industrial Metal Supply (very nice people, although you will need to go into the place to make special orders if you don’t have an account).  I also picked up the new license plates for the car.  Busy day (in addition to doing actual work).  🙂

Copper interconnects and the new license plates.

Working on Battery Interconnects

Well, due to the usual delays of business travel, pulled muscle, Thanksgiving and shopping for Christmas, not much was done until this weekend.

I was able to trim the battery boxes to a lower height – making a much better fit in the various compartments.  Apparently, the trick is to use a carbide blade with 60 to 80 bits in the power saw.  Worked great!

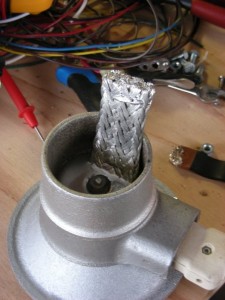
I also started working on the battery interconnects.  I’m looking into flat braided copper cable, with silver-solder for the ends.  However, I’m not happy with the way the ends have worked out – I don’t think they are flat enough yet.  This will take some tinkering to figure out.

Battery Interconnect sitting in the Silver Solder

McMaster’s site rules!

I had been having some trouble trying to find a local source for braided copper grounding straps suitable for making battery interconnects.  No idea why it is hard to find, but there it is.  Sean suggested I try a few sites, and one of them is www.mcmasters.com.  Wow.  460,000 different parts, just about anything you can imagine you would need for just about anything.  (who me? impressed?  Heck yeah!)

Anyways, I ordered the flexible braided copper cable (equivalent to 2/0 AWG) and melting pot for solder last night.  This afternoon – they were delivered.  O_O

Wow.  Color me majorly impressed.

Batteries arrived!

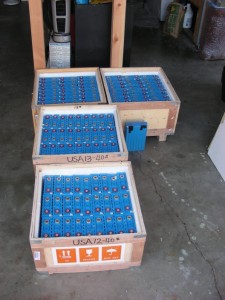
Yay!  I am now the proud owner of 109 Sky Energy 60Ah batteries.  All 690 pounds of ’em (however, some of that weight is the boxes and pallet they arrived on).  Gosh, all I have to do now is (list redacted).  Shouldn’t take too long.  😀

Battery Porn:

109 Lithium Iron Phosphate Batteries

Wye a Motor?

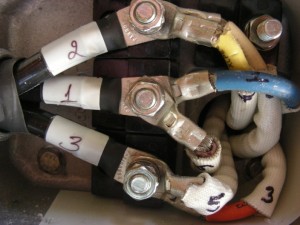
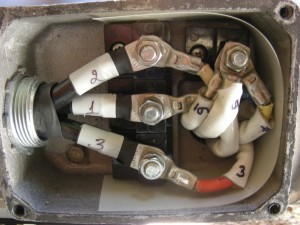
Since I’m going to go with the higher voltage, I have to change the wiring of the motor from Delta to Wye (hence the bad joke in the title).

Getting to the wiring was challenging, since one of the hex bolts holding the protective plate was stripped during initial installation. Thanks to Sears, I now have some nice tools to remove stripped screws and bolts.  Fortunately, my wife went with me to the store, otherwise who knows what I would have ended up bringing home!  (called the “ooooh it’s shiny!” syndrome)

Once I got the wires exposed, I thought a before picture would help explain. Here is the Delta wiring:

Delta wiring for the AC24

And then after the rearrangement of wiring to Wye:

Wye wiring for AC24
Wye wiring for AC24

Now I have to put the cover back on, but that requires instant gasket goop to seal the wires in.  *sigh* Yet another trip to the store.

AC in progress

I’ve had a busy weekend adding in the plug and getting the wiring set up.  The plug is an interesting model – it will automatically eject the plug when the key is turned – very nice feature.

The AC is routed to the relay panel, the charger and to the EKM meter.  The EKM meter has a ring around the live wire to the charger so it can record how much power the charger is using.

Rear Trunk with AC lines

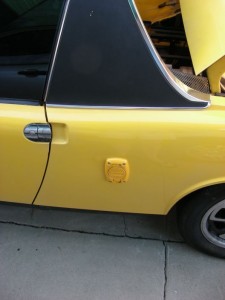
Here’s a picture of the new plug.

AC Plug installed
AC Plug installed

New Relay Panel

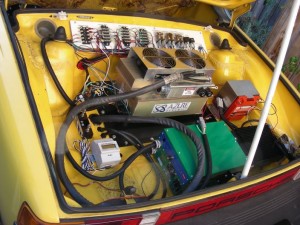
Well, as I mentioned in the last post, I am completely rewiring everything.  About the only thing remaining in the same place are the battery racks and the wires going from engine to mid compartment.   I’m still cleaning up the wiring in the rear trunk…and as you’ll see from the picture I’ve got the controller out (for reprogramming).

New relay panel in rear trunk

I’ve also moved the potbox to a location closer to the relay panel (and out of the most nasty of the weather).

Potbox moved to a new location

Also note the new battery (red), charger (green) and DC-DC converter (black)…so I’ve been keeping busy.  🙂

Major rewiring

Well, nuts.  The new charger won’t fit into the front trunk, so it will be installed in the rear comparment, along with the new DC-DC converter.  I’m also putting the aux battery in the rear compartment.

Net result:  no need for relays in the front compartment or engine compartment.  I’m creating a new relay panel that will go in the rear trunk, and will move the DC shunt to the mid compartment (nearest the amp meter).   Lots of rewiring, and re-organizing, and most likely a new set of connectors in the engine compartment.

I’ll post pictures once the relay panel is installed.